Monday, October 14, 2013

Landing Gear


Nose Gear

10/6/13 - Drilled out the Bearing Block Assembly (75L1-7) and used a 1/4 x 28 tap to tap the holes for the bottom bolts. Also clecoed in place the Lower Bearing Support (75F12-5). Total Time = 3 hours.


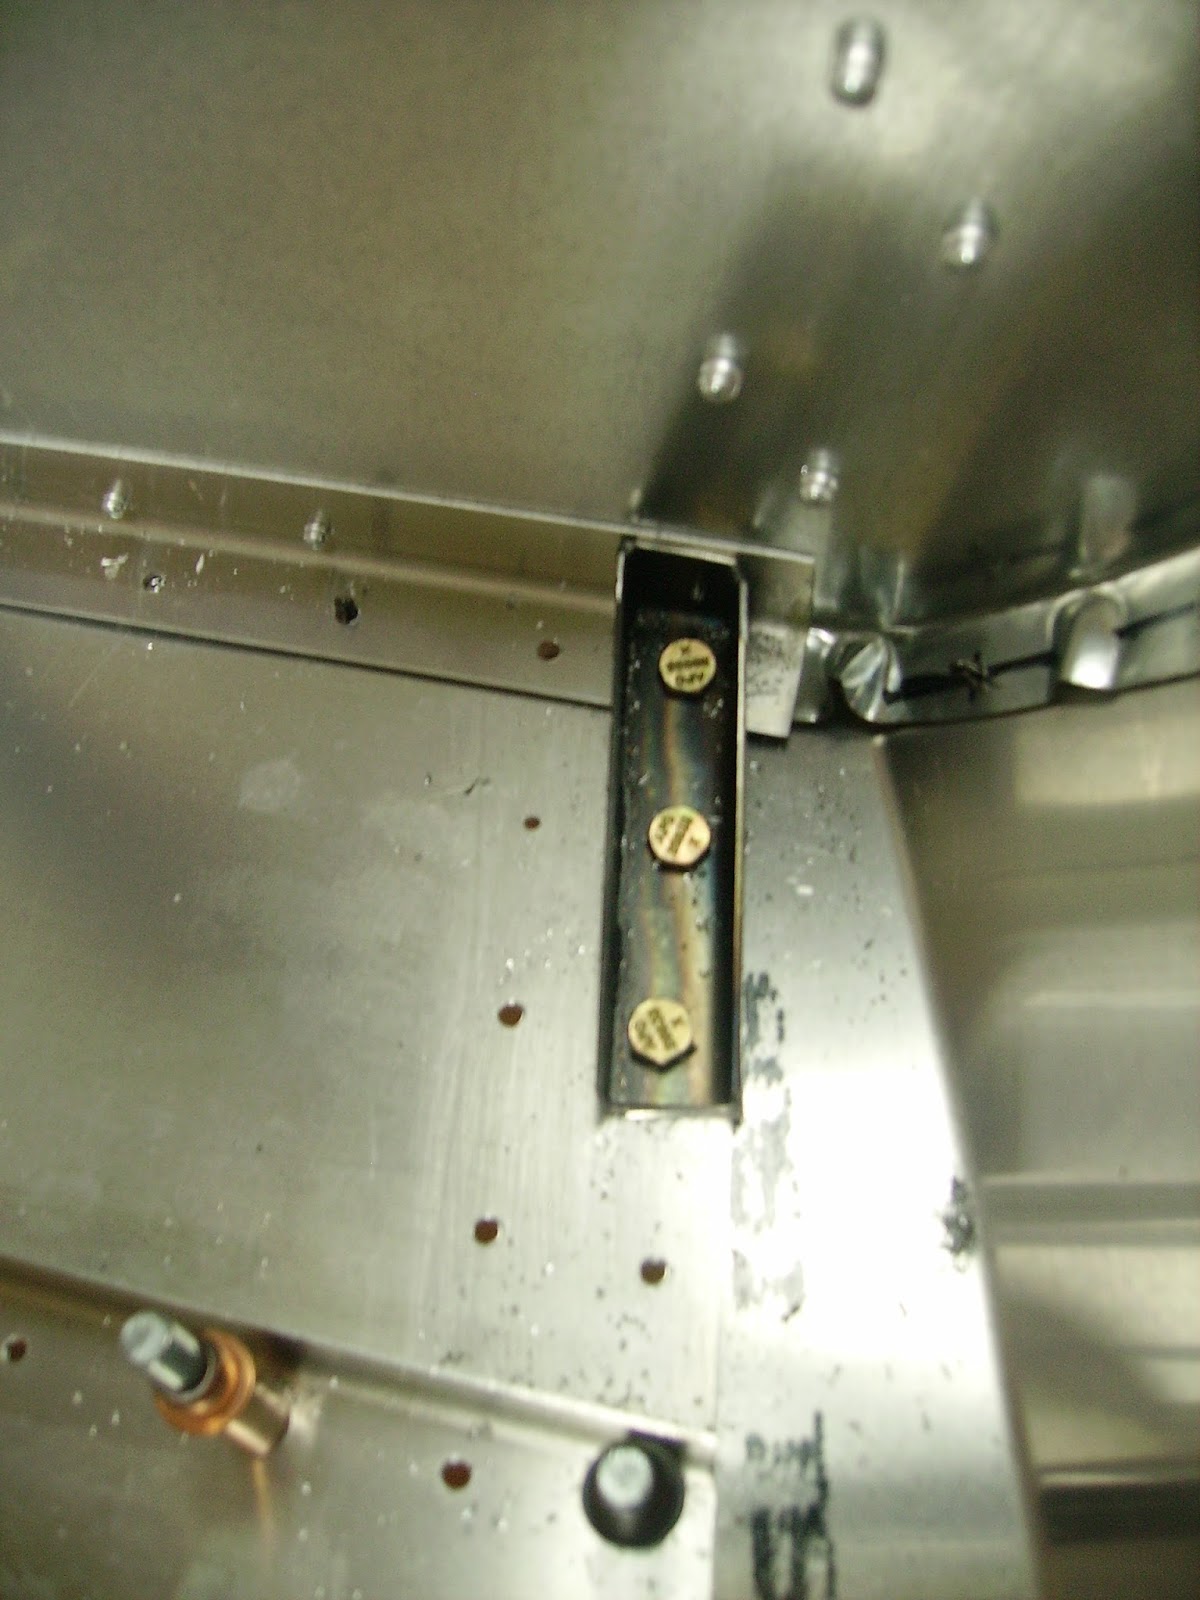
Tightening the Lower Bearing Support Bolts

Tapping the Holes in the Bearing Block
 10/12/13 - Painted the Nose Gear Leg (75L1-1), the Toe Brake Linkage and Bungee Pin. Also drilled out the Nose Wheel Fork (75L1-2) to accept the Nose Gear Leg. Total Time = 3 hours.
 
Painting the Toe Brake Linkage
 10/13/13 - Assembled the front Nose Wheel Rim onto the Matco Tubeless Tire.  Also drilled  the holes to the proper size in the Lower Bearing Support and tightened down to the fuselage with the proper bolts. Installed the Nose Gear Leg in place and positioned the Shock Bungee over the pin on the Nose Gear Leg. Total Time = 4 hours.
Assembling the Nose Wheel Rim with Tire
Nose Gear Leg in Place
10/17/13 - Bolted the Nose Fork (75L1-2) to the Nose Gear Leg. Attached the Nose Wheel Axle (75L1-5/1) and the Axle Spacers (75L1-4) to the Front Wheel and bolted it to the bottom of the Nose Fork. Total Time = 1 hour.
Nose Gear Assembly Completed
10/26/13 - Used a rotary tool to notch areas on the Tundra Main Gear Spring (75L2-1) for the studs on the Gear Strut Fitting. Notched out both the Upper and Lower Support Rubbers (75L2-2) to clear the studs on the Gear Strut Fitting. Total Time = 8 hours.

Tightening the Nuts onto the Main Landing Gear Studs.
10/27/13 - Drilled (2) 1/2 inch holes in the Main Gear Support (75L2-3) and cut off the excess material. Installed the Top Support Rubber, Tundra Main Gear Spring, Bottom Support Rubber and the Main Gear Support. Tightened up the assembly with washers and lock nuts. Assembled the Tubeless Tire Assembly. Installed the Matco Main Gear Axle to the end of the Right Tundra Main Gear Spring. Installed the brake assembly and the Tire assembly onto the Right Main Gear Axle. Total Time = 7 hours.

Tire Assembly with Brakes Added To the Right Tundra Main Gear Spring
11/2/13 - Disassembled all tire assemblies and re-assembled with an RTV bead around the O-ring and the inner core to prevent any slow leak of air from the tires prior to mounting tires onto the fuselage. Total time = 4 hours.
Brake Assembly Added to the Left Main Gear Axle
 11/3/13 - Installed the Matco Main Gear Axle to the Left Tundra Main Gear Spring. Installed the brake assembly, hub and tire onto the Left Main Gear Axle. Removed the fuselage from the sawhorse and placed fuselage onto its own landing gear. Total time = 4 hours.

Hey Look Ma, It Stands On Its Own 3 Legs!
Total Landing Gear Assembly Time = 34 Hours

Thursday, May 30, 2013

Rear & Forward Fuselage Joining

Baggage Area

5/28/13 - Started riveting together the baggage compartment. Total Time = 1 hour.


Checking to See If My Hand Riveter Will Fit Into the Corner
 
6/1/13 - Riveted the back of the baggage compartment. Riveted the baggage upright and the extrusion arm of the forward fuselage to the rear fuselage side skin. Riveted the bottom extrusion on the forward fuselage to the cabin floor. Riveted the gear channel to the rear and forward fuselage. Total Time = 7 hours.

Riveting the Gear Channel to the Forward Fuselage

6/2/13 - Cutoff excess from the end of the top tubes of the Cabin Frame (75F15-1) so it would cleco to the rear wing attachment. Also trimmed the right front tube so it would cleco to the cabin side. Drilled the remaining holes in the cabin frame and into the rear wing attachment as well as the cabin side. Marked the rivet line on the Gear Strut Fitting (75F14-3) and then drilled holes into the gear strut fitting and into the fuselage. Total Time = 5 hours.

Cabin Frame Clecoed in Place
6/9/13 - Drilled all the holes in the Gear Strut Fitting to the proper size for all the bolts and the rivets. Drilled holes in the Gear Channel Doublers (75F10-2) and into the Gear Channel to the proper size. Total Time = 9 hours.

Gear Stut Holes Drilled to Size

Gear Channel Doublers in Place and Drilled to Proper Size

6/15/13 - Sanded, Primed and Painted the Gear Strut Fittings. Cut "L" Angles to 150 mm and placed against the cabin side and the Gear Channel. Drilled all holes to proper size and then deburred all parts, cleaned and coated parts with Cortec anti-corrosion . Total Time = 5 hours.

Painting the Gear Strut Fittings

6/16/13 - Positioned the Firewall flush with the edge of the cabin floor. Drilled holes through the cabin floor and into the Firewall. Postioned the Upper Engine Mount Fitting (75F14-2) and the the Lower Engine Mount Fitting (75F14-1). Drilled holes into the fittings, Firewall and the Longerons. Total time = 3 hours.

Firewall and Engine Mount Fittings in Place
7/1/13 - Made a trip to Viking Aircraft Engines in Edgewater, Fl. to pick up my new 110 HP aircraft engine to power my Zenith CH750 airplane. Bought a one-way airline ticket and rented a mid size SUV to drive it back to Michigan. Everything worked out just fine. It took 18 & 1/2 hours to drive back home but the driver and the cargo made it back in one piece. 
 
The Viking Team Loading the Engine into the Back of the SUV
Viking 110HP Engine Waiting Patiently for Installation. A Thing of Beauty!
7/5/13 - Riveted both the L.H. & R.H. Rear Seat Channels in Place. Also riveted the L.H. & R.H. Seat Supports in place. Bolted and riveted the L.H. & R.H Gear Strut Fittings and the L.H. & R.H. 150 mm "L" angles that are against the side skin to the Gear Strut Fittings. Total Time = 7 hours.

Riveting the Side Skin Gussets

Gear Strut Fittings Bolted and Riveted in Place
7/6/13 - Drilled holes on the underside of the cabin floor into the firewall. Cut "L" angles to fit on the Left Front Side Skin and drilled holes after fluting the "L" angles to follow the curvature of the side skin. Total Time = 3 hours.

Clecoing the Foward Angles into Place
 7/7/13 - Finished installing the "L" angles onto the the right front side skin then installed the Heal Support Gusset (75F10-6). Installed the Forward Angles (75F12-7) onto the "L" angles after trimming them to fit and clecoed them in place. Total Time = 4 hours.

L.H. Side Installed with "L" Angles, Forward Angles and Heal Support Gusset
 7/13/13 - Cut "L" angles to fit onto the Left Front Side Skin. Installed the Forward Angles (75F12-7) on the "L" angles on the L.H. Side Skin. Installed the Heal Support Gusset (75F10-6) on the L.H. side of the Heal Support. Drilled and clecoed all parts in place. Total Time = 5 hours.

Lower Engine Mount Fitting Drilled to Proper Size
 7/14/13 - Drilled all holes to the proper size in the Firewall, Sideskins, "L" Angles, Forward Angles, the Heal Support and Heal Support Gusset. Drilled the Upper and Lower Engine Mount Fittings to the proper size. Installed the L.H. and R.H. Cabin Frame Gussets (75F12-4) to the cabin side and the cabin frame then drilled these holes to the proper size. Total Time = 5 hours.

Cabin Frame Gusset Installed and Holes Drilled to Proper Size
 7/20/13 - Fitted the Instrument Panel (75F16-1) and the Forward Top Skin (75F16-2) into place with clecoes. Drilled holes from the Forward Top Skin into the Firewall and from the Side Skin into the Longeron and the Top Skin. Cut "L" Angles to fit between the Firewall and the Instrument Panel. Drilled out all holes to the proper size. Total Time = 5 hours.
Forward Top Skin and Instrument Panel In Place and Drilled to Proper Size
7/21/13 - Drilled holes through the Forward Top Skin into the cabin frame. Took apart the the Forward Top Skin. Drilled the engine mounting holes to the proper size into the four corners of the Firewall and into the Lower and the Upper Engine Mount Fittings. Total Time = 3 hours.

Engine Mount Holes Drilled Into the Four Corners of the Firewall
7/27/13 - Drilled holes in the top flange of the Engine Bracket through the Firewall and into the Cabin Frame flange. Took off the Cabin Frame and the Firewall. Drilled holes to the proper size into the Rear Wing Attachment, Side Channel and the Top Channel. Removed the Top Channel Assembly for deburring. Total Time = 4 hours.
Top Channel and Rear Wing Attachment Drilled

7/28/13 - Deburred, cleaned and added Cotec anti-corrosion protection to the Rear Wing Attachments, Side Channels, Top Channel and Rear Channel. Reassembled the Top Channel Assembly and clecoed back in place. Sanded the Lower Engine Mount Fittings and then primed and painted them. Sanded the Upper Engine Mount Fittings, primed and painted them. Total Time = 7 hours.

7/29/13 - Sanded, primed and painted the Cabin Frame Gussets. Sanded the Cabin Frame and prepped it for painting. Total Time = 2 hours.
8/4/13 - Deburred the L.H. & R.H. Forward Side Skins, Forward Angles, "L" Angles,  Instrument Panel, Forward Top Skin, Heal Support Gussets, Forward Fuselage Assembly and the Firewall. Painted the Firewall with heat resistant paint. Total Time = 4 hours.

Firewall Painted
8/10/13 - Primed cabin frame with self-etching primer. Painted the cabin frame with silver paint. Total Time = 2 hours.

Cabin Frame Painted
8/17/13 - Deburred, cleaned added corrosion protection to forward fuselage parts. Total Time = 3 hours.
Front Fuselage Parts Deburred, Cleaned and Corrosion Protected

8/18/13 - Reassembled front fuselage parts and started riveting the forward angles and the "L" angles to the front fuselage side skin. Total Time = 7 hours.

Reassebling the Front Fuselage
9/29/13 - Installed the passenger toe brake cylinder supports (6B9-6). Drilled, deburred, cleaned and added corrosion protection. Total Time = 2 hours.

Passenger Toe Brake Supports Drilled and in Place
10/5/13 - Riveted the L.H. & R.H. Forward Side Skins to the firewall and the Forward "L" Angles. Riveted the Brake Cylinder Supports for the both the pilot and passenger side. Also riveted the Heel Support Gussets. Total Time = 3 hours.

Riveting the Side Skins in Place

Total Rear & Forward Fuselage Joining Assembly Time = 96 Hours.

Friday, February 8, 2013

Forward Fuselage Assembly

Forward Fuselage - Back to the basement.

2/2/13 - Clecoed the Floor Stiffener (75F10-4) to the underside of the Cabin Floor (75F10-3). Clamped the Lower Longeron (75F13-1) to the Cabin Floor and drilled holes into the Lower Longeron. Total Time = 2 hours.

Cabin Floor
2/3/13 - Trimmed 20mm off the forward edge of each longeron. Trimmed 120mm off of the rear edge of each longeron. Attached the Pedal Bearing Channel (75F10-7) to the floor skin with clecos. Installed the Bottom Pedal Bearing (75C3-6) by drilling out bearing holes to 3/16" inch. Held the bearings in place with t(2) AN3-16' bolts. Placed Pilot Side Rudder Pedal (75C3-4) onto the Bottom Bearing Channel.Trimmed Rudder Pedal Bearing (75C3-7) by 3/16" so that it would fit into position and drilled holes to 3/16" into bottom of bearing and cabin floor. Placed Passenger Side Bearing in place and drilled holes into the Rudder Pedal Bearing to 3/16" size. Total Time = 2 hours.

Pedal Bearings Installed

Installing the L.H. Arm Rest
Installed the Brake Cylinder Support Extrusions (75C3-8) by placing the brake cylinder into the extrusions to space them properly. Drilled holes in the cabin floor. Installed the Heel Support (75F10-5) with clecoes. Installed the Seat Channel (75F11-1) with clecoes. Installed the L.H. and R.H. Seat Supports (75F11-2)with clecoes. Installed the Gear Channel (75F11-3) after trimming the corners with clecoes. Installed the L.H. Arm Rest (75F12-1) and the R.H. Arm Rest (75F11-6) with clecoes. Installed the Pilot Side Cabin Skin (75F-7) and the Passenger Side Cabin Skin (75F-7). Total Time = 7 hours.

L.H. and R.H. Cabin Side Skin Installed
2/10/13 - Cut two pieces of "L" Angle and installed them against the Seat Supports flush with the back of the Gear Channel.

 Back to the Garage
Shoulder Harness Attachment Installed
Drilled all the holes in the Baggage Back (75F5-2) and the Baggage Floor (75F5-3) to the proper size. Clecoed the Baggage Back and the Baggage Floor into the Rear Fuselage. Installed the Shoulder Harness Attachment (75F3-8) with clecoes and drilled holes to the proper size. Installed the Flapperon Control Covers (75F3-5) with clecoes and drilled all the holes to the proper size. Installed the Right Baggage Upright (75F5-4) and the Left Baggage Upright (75F5-5) with clecoes. Total Time = 2 hours. 
Baggage Back, Floor & Uprights Installed
2/17/13 - Cut (2) "L" Angles to 55 mm and 100 mm long and installed them on the Flapperon Control Cover under the baggage floor and drilled the holes to the proper size. Installed the Torque Tube Bearing Support (75F5-1), Right Control Tunnel Side (75F6-2), Left Control Tunnel Side (75F6-3) and the Control Tunnel Top (75F6-4). and clecoed them in place. Total Time = 7 hours.

Baggage Floors Installed
2/23/13 - Cut (2) "L" Angles to 270 mm and 240 mm long, drilled holes and installed them on the bottom of the baggage floors. Installed the Gussets (75F4-6) to the side skin and the Torque Tube Bearing Channel. Installed the left and right Baggage Floors and then drilled all the holes to the proper size. Total Time = 3 hours.
Drilling the Side Channel Covers
2/24/13 - Installed the Side Channel Doubler Extrusion (75F6-6) behind the upright, then drilled and clecoed in place. Installed the Side Channel Cover (75F4- 2) with clecoes. Used the cutoff wheel saw to trim the corners of the extrusions to match the side and bottom of the fuselage and filed down the corners smooth. Guided the extrusions of the forward fuselage into the rear fuselage and clecoed into place. Total Time = 7 hours.
Using the Cutoff Wheel to Trim Extrusions Flush with Skins

Forward Fuselage Joined to the Rear Fuselage
3/23/13 - Installed Longeron Gussets (75F4-9) on both the left and right hand sisde. Total Time = 1 hour

Added Longeron Gussets
3/24/13 - Dilled holes in the Longeron, Side Skin, Longeron Gussets and the Side Skin Gussets (75F4-9). Installed 40 mm side "L" Angles and drilled to proper size. Clecoed to the Seat Front and the Cabin Side. Installed 90 mm side "L" angles, drilled to proper size holes and clecoed to the Front Seat Front and the Cabin Side. Total Time = 5 hours.

Drilling Holes into Longeron, Side Skin and Gussets

"L" Angles Installed
3/29/13 - Reached under the Seat Base and drilled (2) holes through the Seat Base Side and into the Cabin Side on both the Pilot and Passenger Sides. Fitted all pieces of the interior together with clecoes so that all parts were square. Total Time = 4 hours

All Parts Fitted Together With Clecoes Until Square
3/31/13 - Installed the Lower Seat Belt Attachment (75F13-1) on the aft most vetical extrusion on both sides of the Cabin Walls and then drilled holes to the proper size. Also installed the Inboard Seat Belt Attachment (75F13-7) on the inboard side of the Gear Channel against the Arm Rest on both the pilot and passenger side and drilled the holes to the proper size. Total Time = 6 hours.

Inboard Seat Belt Attachment Installed on Inside of Armrest

Lower Seat Belt Attachment Installed
4/6/13 - Drilled out all holes in the cabin area to the final hole size. Installed the forward side skin (75F12-2) on both the pilot and the passenger side. Total Time = 8 hours.

Installed Forward Side Skin
4/7/13 - Finished drilling out all holes in the forward cabin to the proper hole size. Trimmed both ends of the cabin extrusion on the pilot and passenger side. Began deburring process on the cabin. Total Time = 8 hours.

4/14/13 - Continued with the deburring process on the cabin area. Total Time = 2 hours.

4/16/13 - Deburring of cabin area.  Total Time = 3 hours.

4/18/13 - Deburring of cabin area. Total time = 3 hours.

Using Scotchbrite on Aluminum Parts
4/20/13 - Deburring of the forward cabin area.  Total Time = 3 hours.

Deburring Aluminum Parts
4/21/13 - Deburring of the forward cabin area. Total Time = 4 hours.

5/4/13 - Prepared and primed the suface of the Control Tube (75C1-6) to get it ready for painting. Added corrosion protection to the Baggage Back Assembly. Total Time = 3 hours.

Control Tube Painted
5/5/13 - Painted Control Tube with silver paint. Riveted the Baggage Back Assembly together. Total Time = 2 hours.

Baggage Back Riveted Together
5/6/13 - Prepared and primed the Flaperon Bracket (75C1-1) to get it ready for painting. Added corrosion protection to the Baggage Floor. Riveted the (3) "L" angle stiffeners to the backside of the baggage floor. Total Time = 2 hours.

Riveting the Side Channel Doubler in Place

From the Backside
 5/7/13 - Painted the Linear Actuator Bracket. Added corrosion protection to the Side Channel Doubler Extrusion, installed and then riveted in place. Added corrosion protection to the R.H. & L.H. Lower Baggage Floor and also to the "L" angles. Riveted only the forward 'L" angle stiffeners in place at this time. Total Time = 2 hours. 

Linear Actuator Bracket Painted
5/11/13 - Cut "L" Angles for the Bearing Mixer Support (75C1-5). Drilled holes into the "L" Angles and the Bearing Mixer Support. Drilled holes in the Flaperon Bellcrank Bearing (75C1-8) and the Flaperon Bellcrank Bushing (75C1-9). Total Time = 7 hours.

Control Tube with Bearings
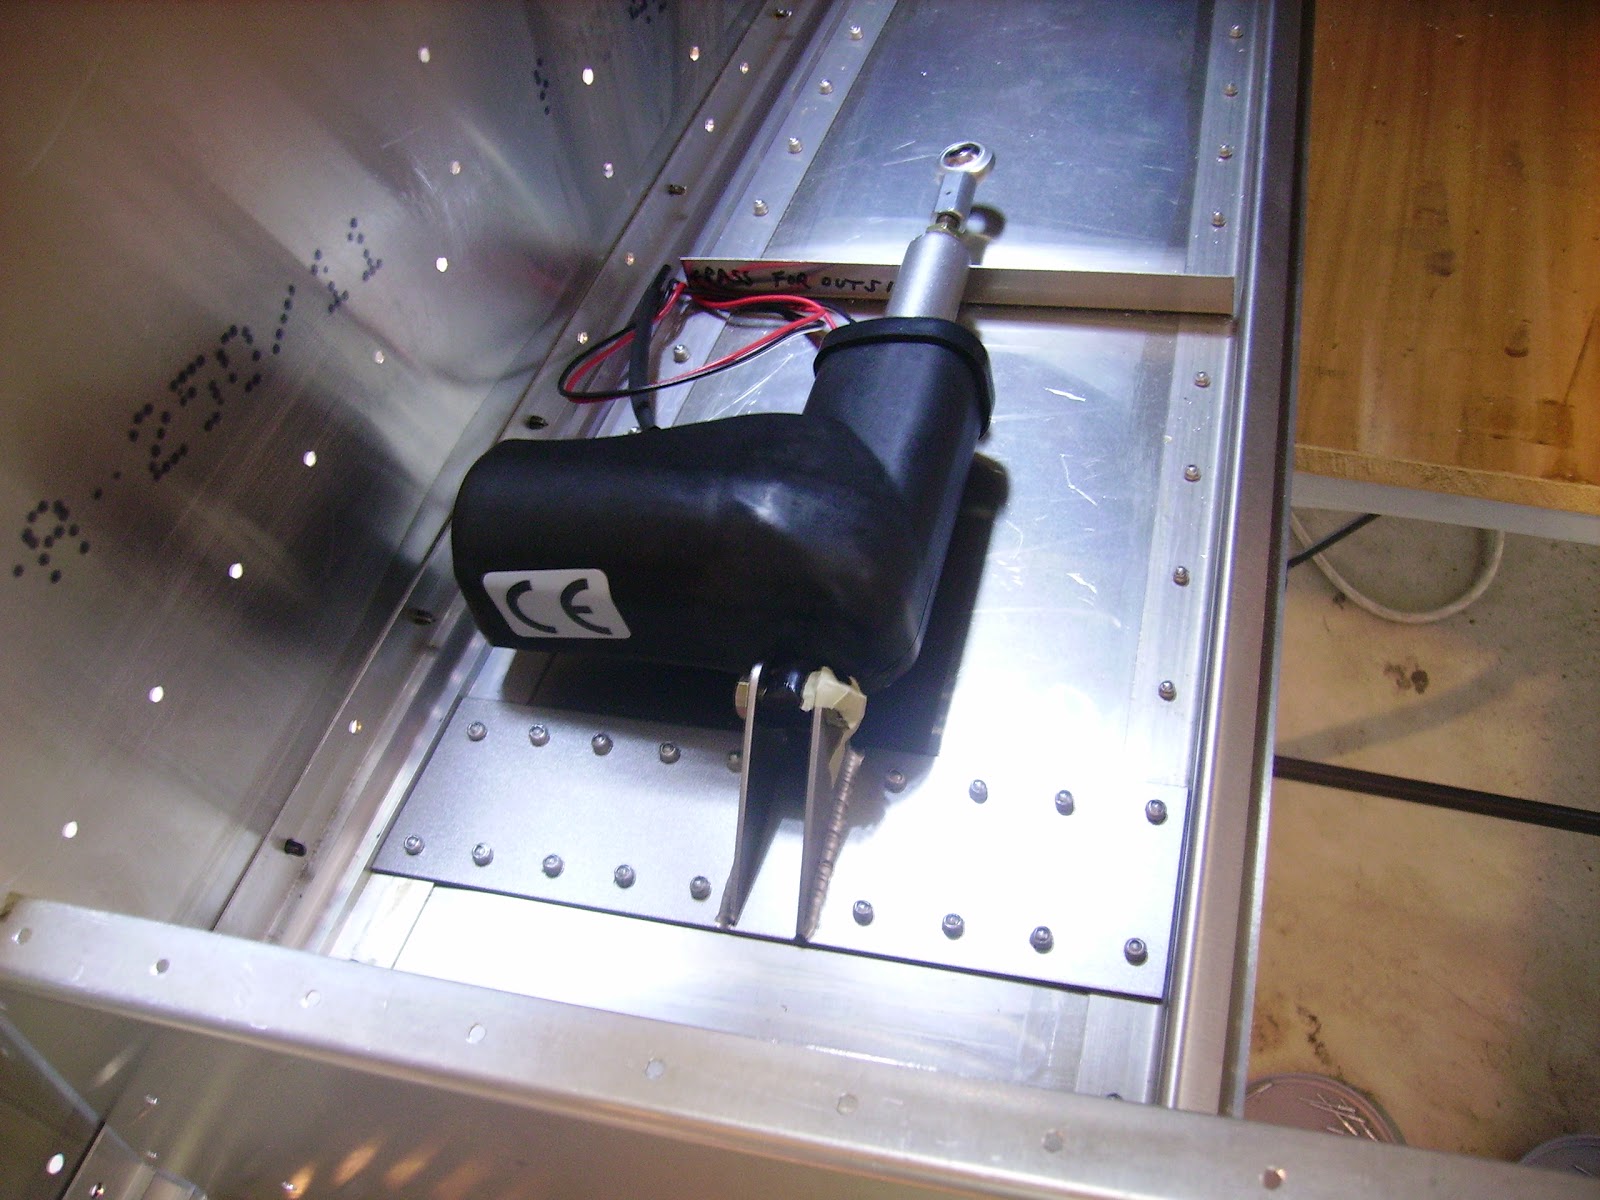
Linear Actuator Mounted in Place
5/12/13 - Riveted Linear Actuator Mount to the fuselage. Bolted together the Mixer Bearing to the Bearing Support. Mounted the Linear Actuator (75C1-2) to the Actuator Mount. Drilled holes to the proper size in the Rear Torque Tube Bearing (75C2-3) and the Rear Torque Tube Bearing Doubler (75C2-4). Bolted assembly to the Torque Tube Bearing Support. Total Time = 3 hours.

Riveted Fair Leads to Torque Tube Bearing Support
5/19/13 - Prepped all baggage area parts with anti-corrosion material. Installed Fair Leads on the Torque Tube Bearing Support. Riveted the Fair Leads in place. Re-installed Baggage Area back into the Fuselage and started to rivet parts in place. Total Time = 7 Hours.

Torque Tube Bearing Support and Control Tube Assembly Installed
5/26/13 - Reassembled baggage area with clecoes after applying anti-corrosion protection. Reassembled forward fuselage assembly with clecoes after applying anti-corrosion protection. Re-joined the forward fuselage to the rear fuselage and prepared to rivet. Total Time = 5 hours.


Rear & Forward Fuselage Re-joined Ready for Riveting
Total Forward Fuselage Assembly Time = 93 Hours.